Trapped: Marine Tankers Come to the Rescue on Iwo Jima
By: Jonathan BernsteinPosted on January 15, 2024
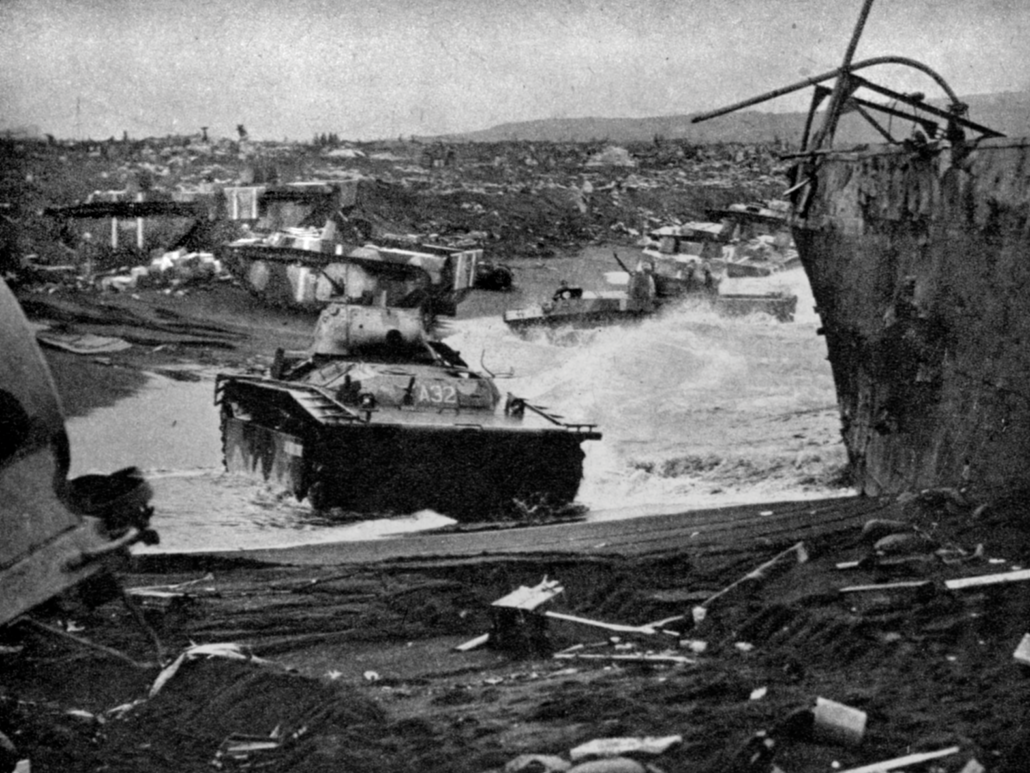
The moment the bow doors opened, and the ramp dropped on LSM-44, Company C’s tanks from the 5th Tank Battalion were on the move into the gritty black sand of Iwo Jima’s Red Beach 2. There had been six tanks aboard—a mix of Headquarters’ and 2nd and 3rd Platoons’—and they had been called on at 11:48 a.m. to hit the beach in support of 1st Battalion, 28th Marines. Co C turned right as they disembarked, following the beachmaster’s directions to the safest egress point. However, the loose volcanic sand wreaked havoc on the tank tracks, and one of 3rd Plt’s tanks threw a track as they headed up the beach. They were under mortar fire almost immediately, but the rise in the beach protected the crews from direct fire enough to enable them to dismount, drop their tanks’ wading stacks and remove any waterproofing that might hinder them in the fight.
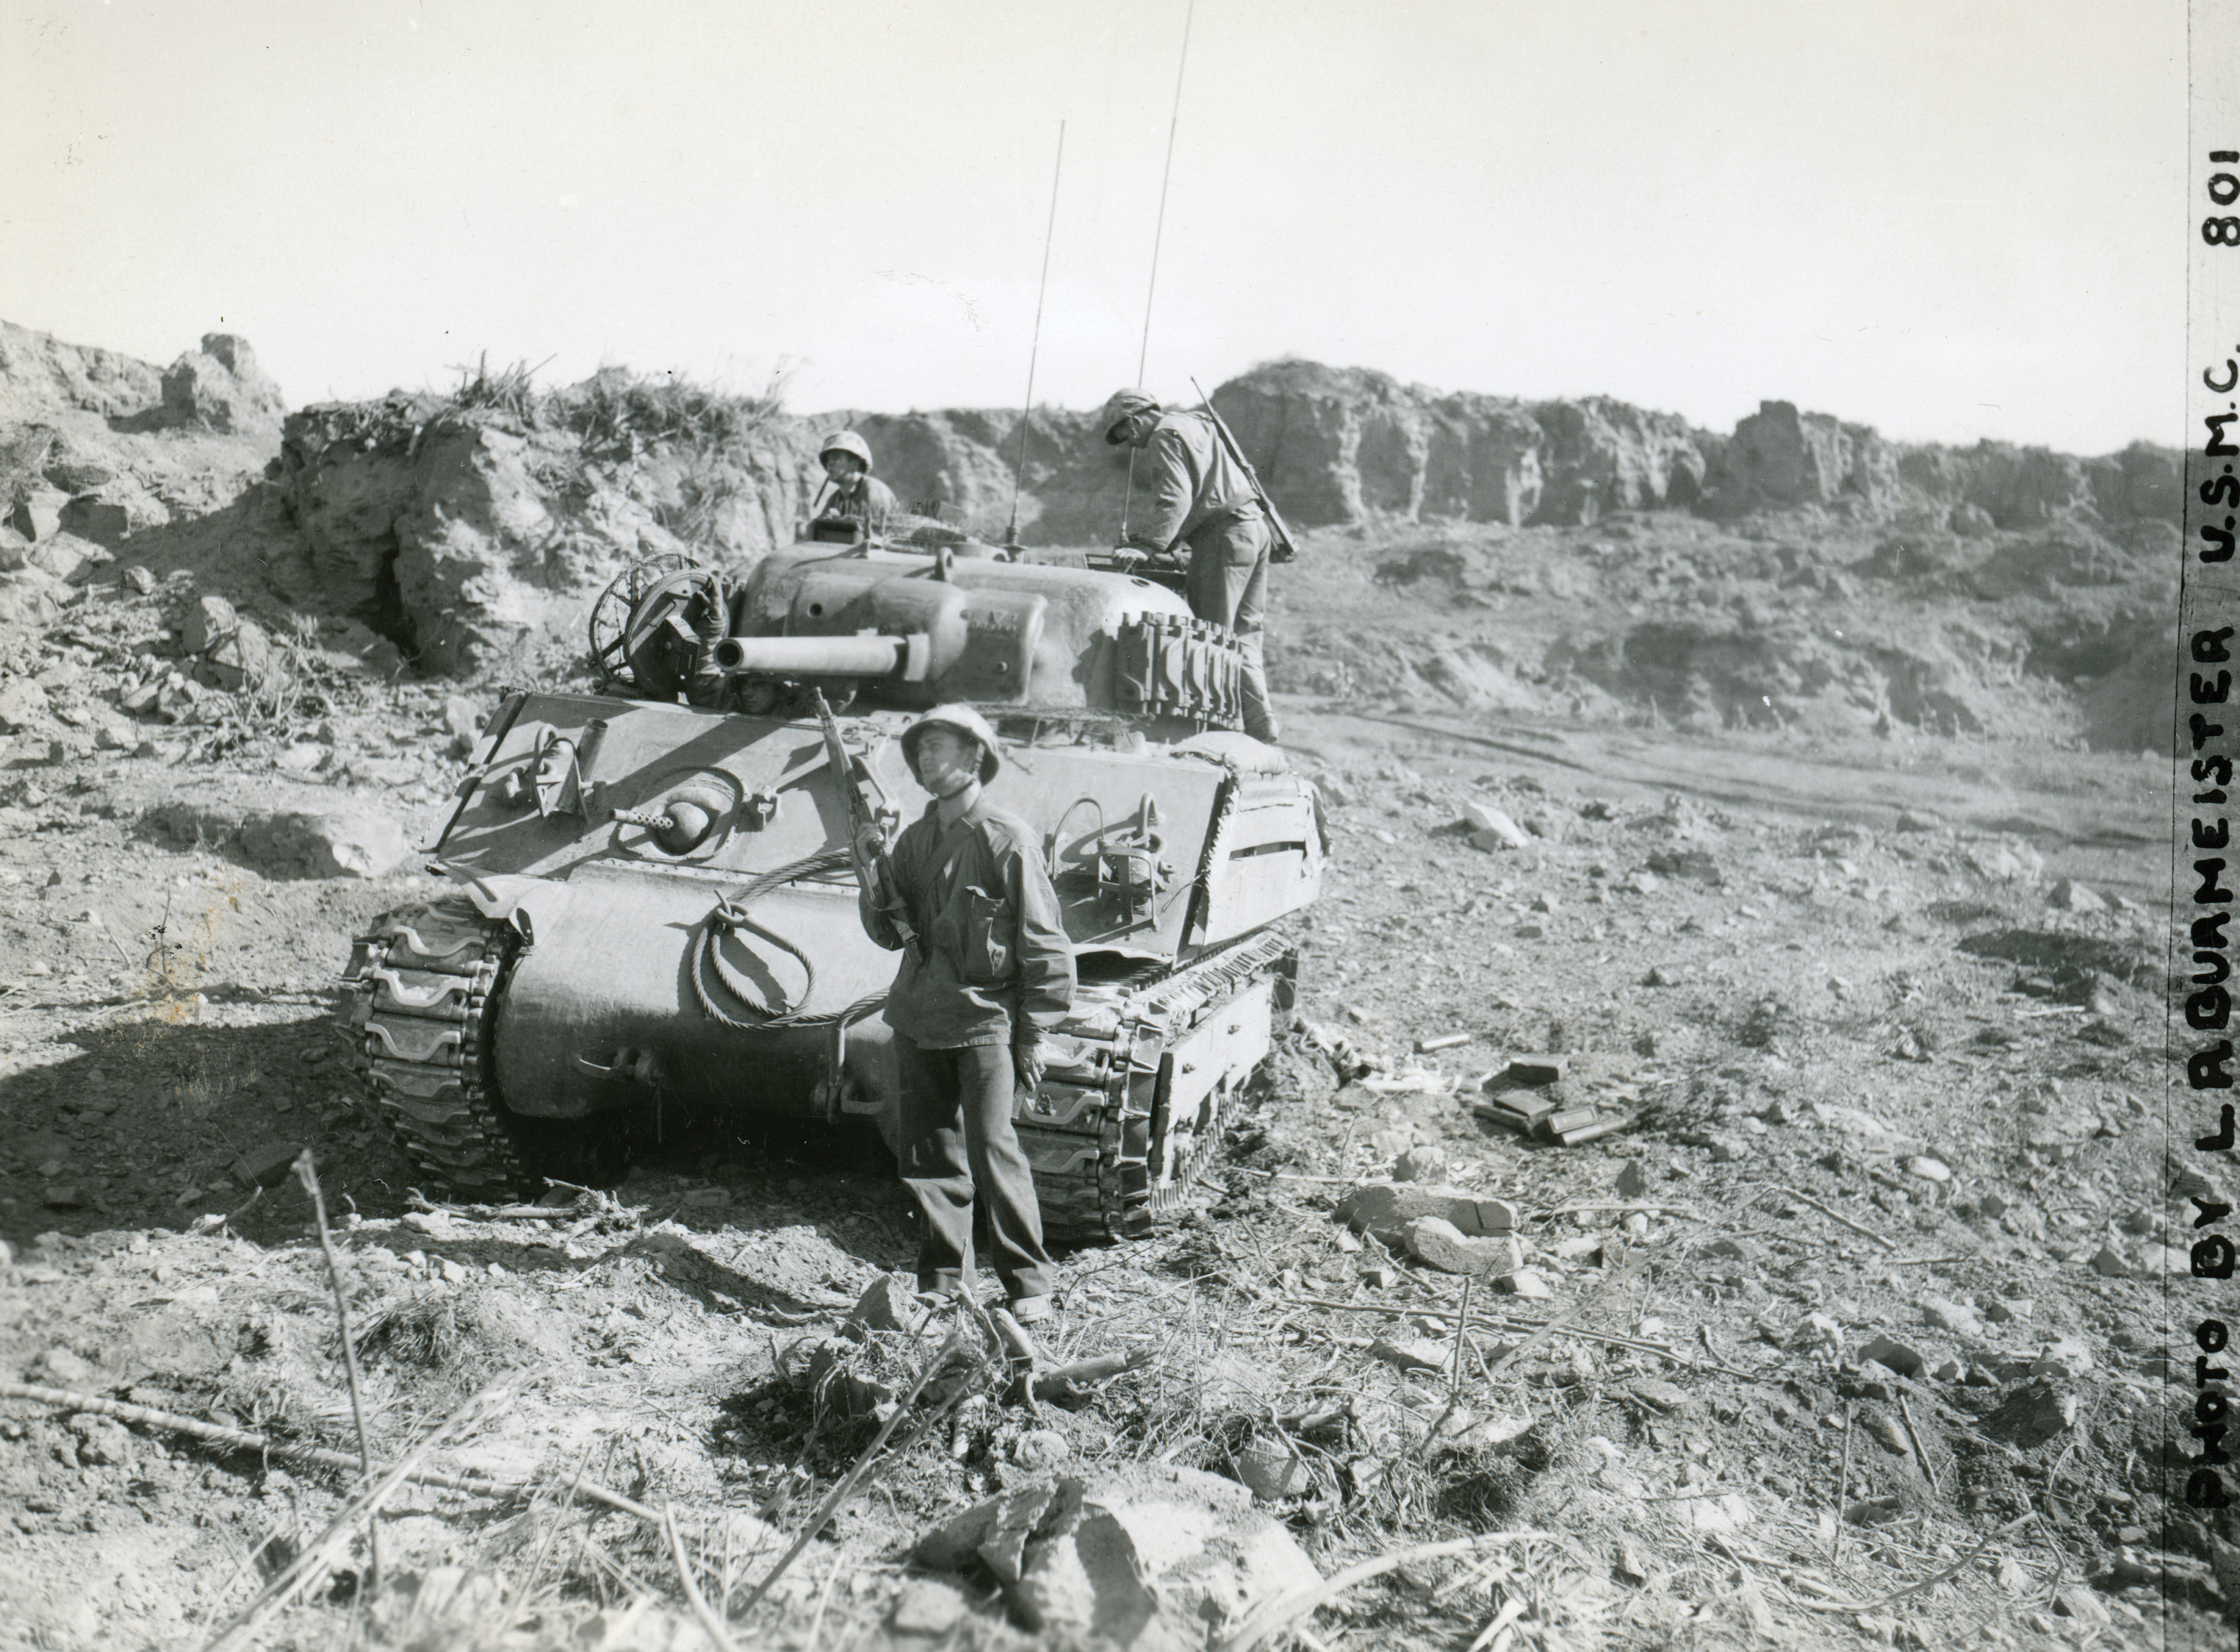
Co C, split evenly between LSM-43, -44 and -46, landed with 14 tanks, one tank dozer, two flame tanks and an M32 Recovery Vehicle. The company broke down into the Headquarters Plt with two tanks and the dozer, four line platoons with three tanks each, and two attached flame tanks, to be used wherever they were most needed. Second Lieutenant Leonard Blake from Pennsylvania led 3rd Plt. His three tanks, “Jeannie,” “Killer” and “Lucky,” were all brand-new M4A3 Shermans, the Marine Corps’ new standard tank which was making its combat debut on Iwo Jima. Lucky, driven by 19-year-old Corporal Leighton Willhite, would be the first from LSM-44 on the beach.
Issued to the battalion in October 1944, the new tank had better armor protection, better and safer internal ammunition stowage, and a gas-powered Ford V-8 engine that replaced the M4A2’s twin diesel. In addition to these improvements, each company in the 5th Tank Battalion utilized materials on hand in Hawaii to better defend against Japanese magnetic and shaped charge antitank mines that had been encountered in previous campaigns. Co C’s report outlines the basic modifications: “2-inch planking with a 2-inch air space between planks and hull were placed on sides of tanks. Drivers hatches had a frame welded to them which was covered with chicken wire. The hatches on the turret and the area around them had 10 penny nails welded to them so that they resembled a ‘bed of nails.’ ”
Wooden planks were also mounted on the suspension, and corrugated sheet metal, cut into jagged patterns, was nailed to the upper edges of the hull-mounted planks, making it difficult and hazardous for enemy infantry to grab or climb onto the tank. The upper surface of the tank’s hull was also covered in sandbags, held in place by chicken wire, to further deter magnetic mines from adhering flush to the hull.
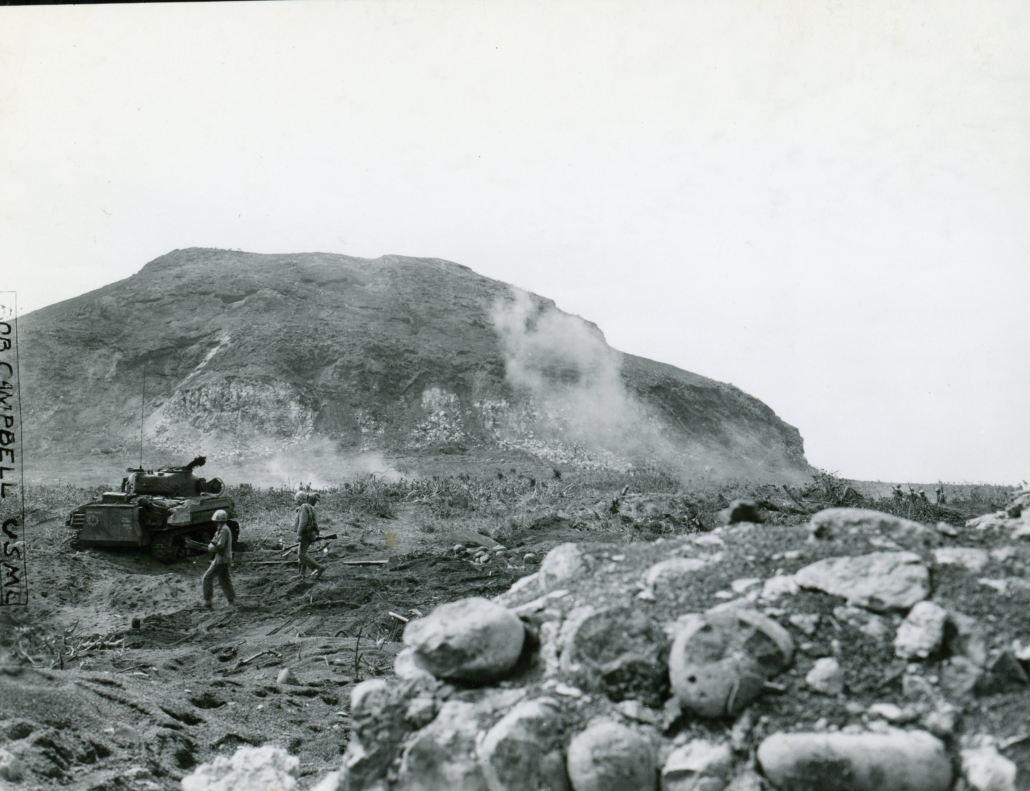
Co C’s mission was to support the 28th Marine Regiment’s drive westward across the island to the western beaches before turning south and heading for the most significant terrain feature on the island: Mount Suribachi, code-named “Hot Rocks.” With the infantry landing almost three hours prior to the tanks’ arrival, they had already gained a foothold, with 1st Battalion, 28th Marines, leading the way and 2nd Bn deployed east of them, oriented to the south and Suribachi. The tanks were a welcome sight as they crested the beach and entered the fray.
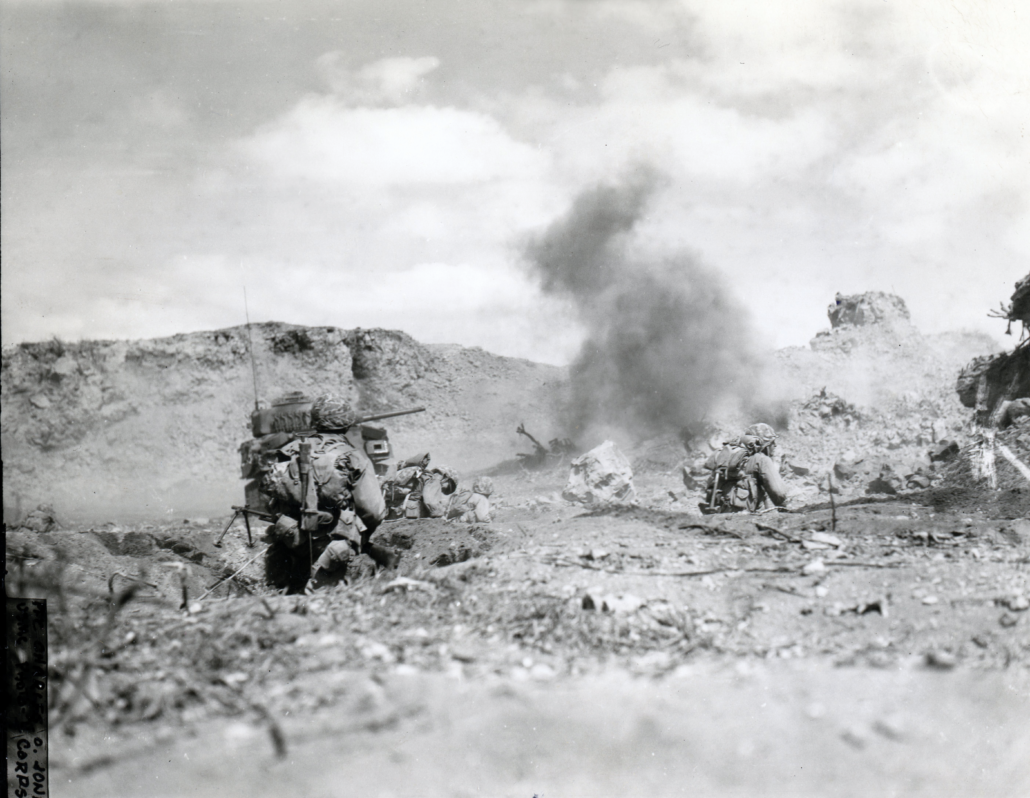
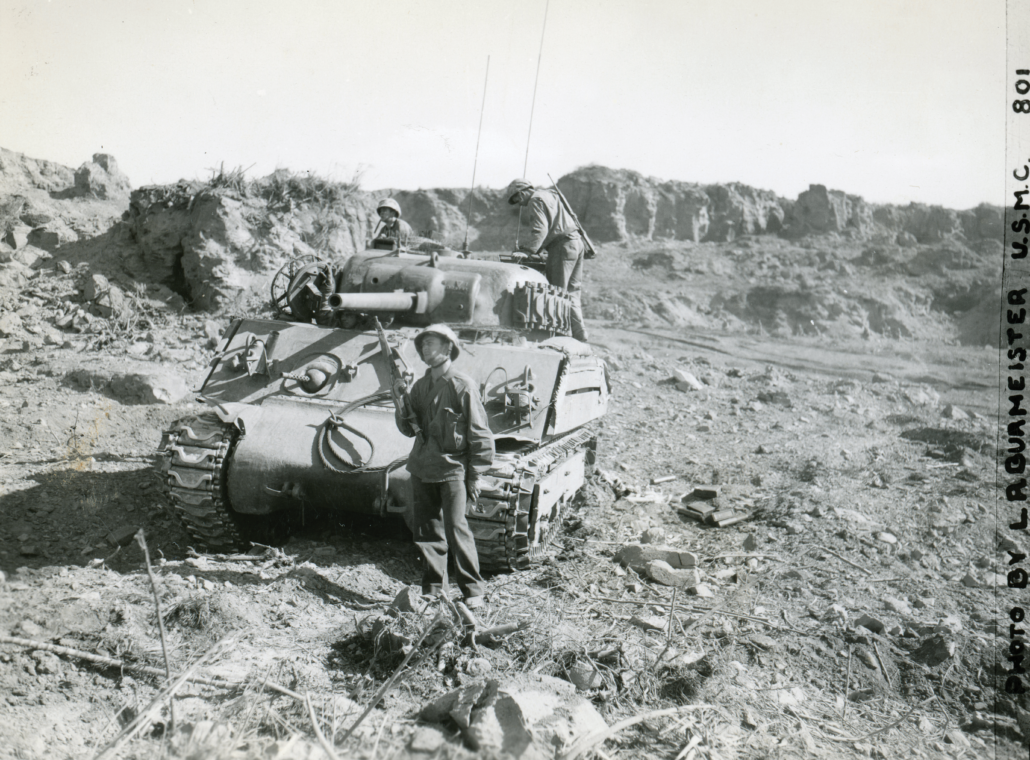
(Photo courtesy of National Archives)
The tanks’ 75 mm guns gave the 28th Marines a significant increase in firepower and a better means for taking out bunkers and machine-gun nests. Each tank carried 100 rounds of ammunition: 60 rounds of high-explosive M48; 30 rounds of armor-piercing, capped-tracer M61; and 10 rounds of white phosphorus. While the armor-piercing round did give Co C’s crews the ability to penetrate concrete bunkers, it was the M48 high-explosive rounds that would see the highest rate of consumption in the assault on Suribachi.
With the whole company ashore, Co C’s commander, Captain Edward Nelson, found the command post and spoke to the first sergeant, who was the senior surviving man. According to Nelson, Marines of the 1/28 had reached their objective “but were pinned down and receiving heavy casualties from pillboxes and block houses bypassed in the attack.”
He and the 1st Sgt agreed that the entire Tank Co would eliminate any enemy positions between the command post and the front lines. However, immediately after moving out, the tank column came under fire from a hidden 47mm antitank gun. Four tanks were hit before the gun was destroyed. Two of those tanks received penetrations through the front face of the turret on the right side of the gun shield.
In 3rd Plt, Sergeant Donald North’s tank, Killer, took two 47mm antitank rounds through the front of his turret, badly wounding him and his gunner. They were lucky, though, because their tank was still functional, and they drove back to the assembly area where they could be tended to.
Moving the wounded out of harm’s way was critical. Because there was minimal cover anywhere on the island, crews using the tank’s upper hatches were exposed to enemy sniper and artillery fire; climbing onto a tank to get a wounded crew out was almost impossible. It was suicide to leave the tank through the upper hatches. As a result, all ingress and egress on the battalion’s tanks was routed through the bottom hatch for the entire campaign. Wounded crews in an immobilized tank would either have to be taken out through the bottom hatch or wait for a recovery vehicle to move the tank to a safer area.
North and his gunner were on their way to a hospital ship by the next morning, while Killer was repaired by battalion maintenance. Since the tank had not burned, the armor was not compromised and could be repaired. The 47mm shell holes were patched, the fire control was repaired, and Killer returned to the front lines with a new commander and gunner two days later, bringing 3rd Plt back to full strength.
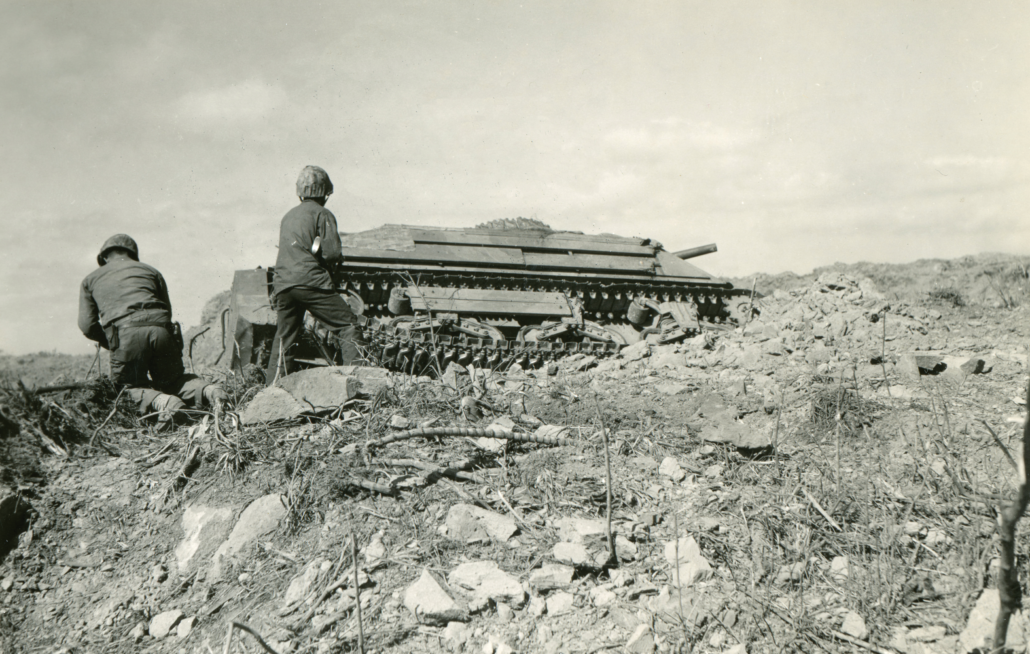
Over the next three days, 3rd Plt would be on Co C’s right flank, supporting landing team 128’s advance on Mount Suribachi, firing high explosives at targets on the mountain’s slopes. By noon on D+4, Co C was sent back to the bivouac area for refueling, re-arming and maintenance. One of 3rd Plt’s most intense actions came on March 1, when they were in support of 1st Bn, 28th Marines during the assault on Hill 362. Blake’s three tanks approached a cave complex on the western side of Iwo Jima and attempted to engage Japanese forces. Platoon Sergeant Robert McIntire’s tank, Jeannie, was in the lead, with Lucky behind and to the right. Killer and the flamethrower tank “Torch” followed closely behind. As they advanced, McIntire sighted a cave with several Japanese soldiers in it and moved his tank to engage. However, what he didn’t see was the Japanese machine-gun emplacement dug into the ground ahead of his tank. When the tank drove over it, the roof collapsed, trapping the tank and its crew.
As the tank nosed down into the hole, Japanese infantry swarmed out and onto the tank. Blake quickly grabbed the tank commander’s override and slewed his tank’s turret to engage the enemy infantry. Its coaxial .30-caliber machine gun killed a number of the Japanese soldiers climbing on McIntire’s tank, but he and his crew were still trapped inside. They couldn’t go out the bottom hatch because it would open right into the pillbox of more enemy soldiers. With the potential for Japanese soldiers on top of the tank or waiting just outside, hidden from Blake’s view, McIntire realized his crew had no place to go. Grabbing the radio mike, McIntire called Blake for help.
Blake realized the only way to get McIntire and his crew out was to go over to the tank, climb on top, and let them know it was safe to come out. He turned to his crew and asked for two volunteers to accompany him and attempt the rescue. While initially no one volunteered, Corporal Willhite grabbed his .45 and said, “I’ll go with you, Lieutenant.”
The pair cautiously made their way over to the disabled tank, Blake moving left toward the rear of the tank and Willhite covering him. Neither knew how many Japanese soldiers were on the far side of the tank. A burst from Blake’s Thompson killed three soldiers as he rounded the corner. Willhite covered him as Blake then climbed up onto the tank’s hull and banged on the driver’s hatch.
“Two Japanese came out of nowhere with their rifles and bayonets,” Willhite recalled. “I shot them, but I don’t know if I killed them.” McIntire and his four Marines climbed out of the tank and rallied at its rear with Blake’s crew. They removed the gun’s breechblock and the critical radio components before abandoning the tank.
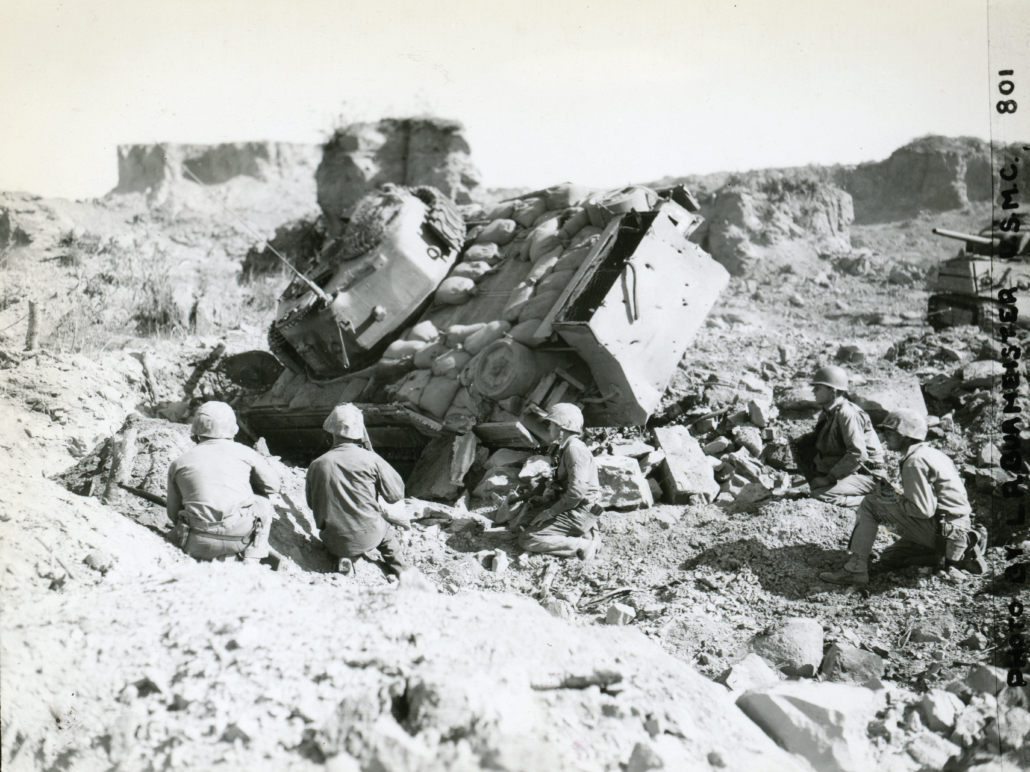
Meanwhile, Torch, their accompanying flame tank, moved up to cover the crew’s extraction. According to Torch’s commander, “The [enemy] dived into a shell hole and [that] is where they met their doom with our flame.” McIntire’s crew piled into Killer and Lucky as the platoon pulled back to safety. McIntire took over as the commander of Killer, and 3rd Plt operated with two tanks until Jeannie could be recovered. Because of the intensity of combat in the area—and the severity of how deeply Jeannie was stuck in the hole—it would be a full three days before the tank was retrieved.
Third Plt and Co C continued to support both the 28th and 26th Marines as they pushed north on Iwo Jima’s west side. Three weeks after rescuing McIntire, Blake’s platoon was called upon to destroy an abandoned Co A tank so the Japanese couldn’t get any information from it. As they neared the target, Blake’s tank hit a mine, breaking the track and immobilizing them. His gunner quickly fired upon the abandoned tank, setting it ablaze, while another 3rd Plt tank crew hooked up their tow cables and prepared to pull Lucky to safety. As they were leaving the area, a Japanese infantryman threw a satchel charge under the engine, knocking it out but not stopping the two tanks from making it back to friendly territory.
The battle officially ended five days later. After the battle, the entire 5th Marine Division returned to Hawaii for refitting and training for the invasion of Japan. The 5th Tank Battalion turned in their tanks to the depot on Oahu for maintenance and refurbishment. Blake and Willhite received the Silver Star and Bronze Star, respectively, for their heroic actions on Iwo Jima.
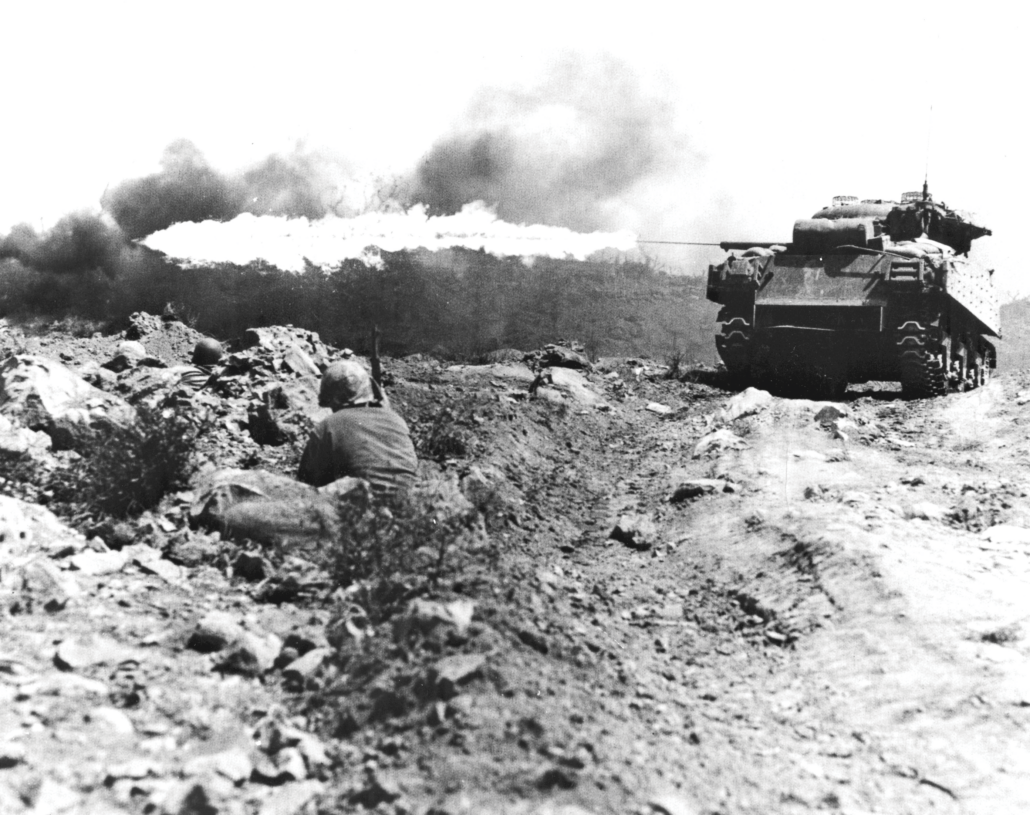
The after-action reviews from both 4th and 5th Tank Battalions, which had used the POA-CWS-H1 flame tanks like Torch, were unanimous in their comments that more flame tanks were required. The 4th and 5th Marine Division comments echoed those sentiments, and as a result, 72 tanks were pulled from existing stocks on Oahu to be converted into the new POA-CWS-H5 flamethrower tank. This new variant was built on the existing M4A3, but unlike the eight POA-CWS-H1 tanks used on Iwo Jima, the new H5 mounted a flamethrower coaxially with the main gun. This was intended to give Marine tank crews the ability to engage with both the 75mm cannon and the flame thrower.
Lucky was the 50th tank selected for this conversion, so in August 1945, the ammunition stowage bins under the turret floor were removed and two massive napalm storage tanks were added. The ammunition capacity for the main gun was reduced by 60%, retaining roughly 40 rounds. She would be ready for combat by the end of the month, but fortunately there would be no need for her further combat service.
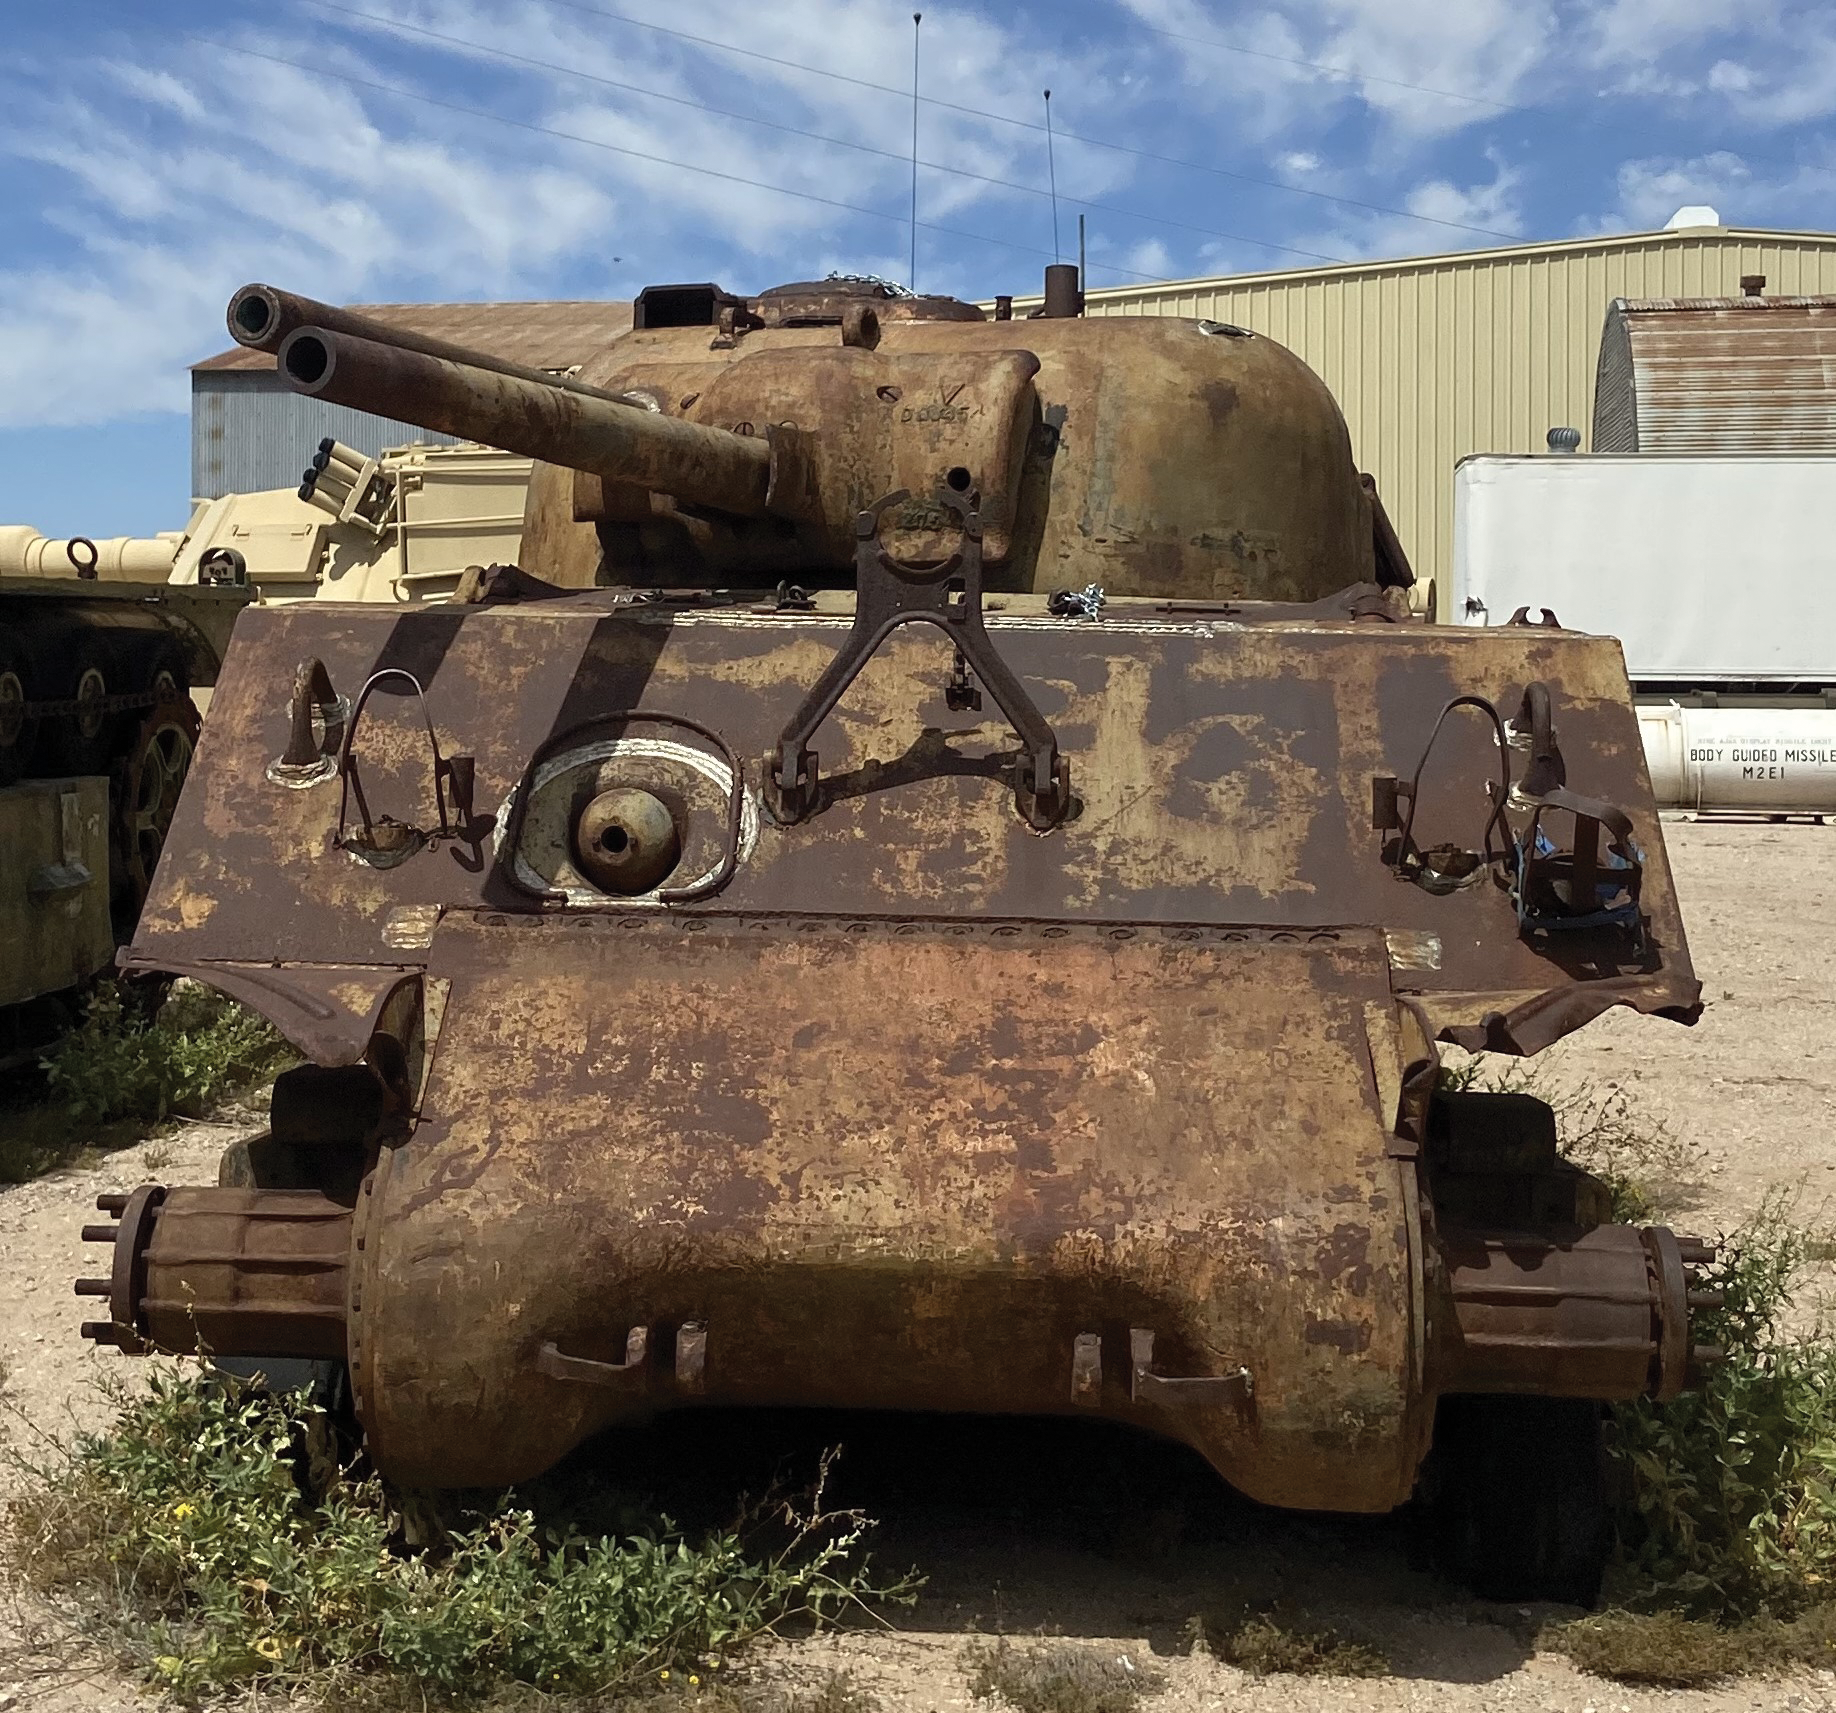
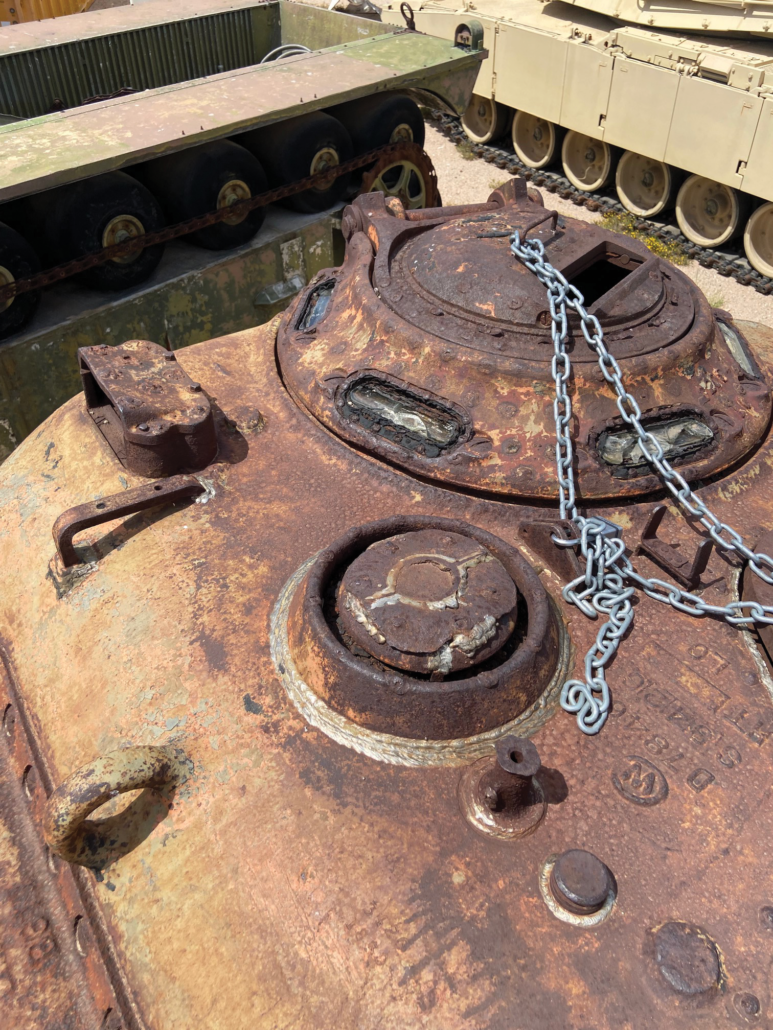
Lucky—or M4A3 serial number 49617—then returned to the States and made her way to Marine Corps Base Camp Lejeune, N.C., where an attempt was made in the 1970s to preserve her. But because of a lack of funding, she was moved off into the woods in one of the 2nd Tank Battalion’s training areas, where she remained until being rediscovered in 2000 and shipped to the National Museum of the Marine Corps in Triangle, Va., the following year. The tank remained in storage until 2020 when, due to a reduction in storage buildings, it was sent out on loan to the Pima Air & Space Museum in Tucson, Ariz., where it currently sits. A curatorial visit by museum staff in June of 2023 identified the weld scarring patterns on the turret roof as unique to the 5th Tank Bn on Iwo Jima, and from there, research into the 5th Tank Bn and this tank’s history was underway.
Author’s bio: Jonathan Bernstein is the arms and armor curator for the National Museum of the Marine Corps. Previously he was the director/curator of the Air Defense Artillery Museum. Bernstein began his museum career in 1991 at the USS Intrepid Sea Air & Space Museum and has served in numerous museum roles since then. He was an Army aviation officer, flying AH-64A and D Apache attack helicopters with the 1-1-4th Attack Reconnaissance Battalion, PA NG from 2006-2012. He has published a number of books and articles on military and aviation history. He is the 2023 winner of the Marine Corps Heritage Foundation Robert Debs Heinl Jr. Award.